
 Pin it
Each mini cheesecake packs a dreamy layer of caramel cookie spread and skips the oven altogether. You'll love the crumbly Biscoff base that's topped with ultra-creamy cheesecake bursting with warm spice. Every bite is loaded with that classic caramel hint but isn't too sweet. Serve them at get-togethers or anytime you want an easy showstopper. They take little work but will totally wow your crowd.
After running into Biscoff spread on a Belgium trip, I couldn't stop dreaming up desserts with it. These mini cheesecakes became my go-to for parties after everyone went nuts for them at Christmas. Even my mother-in-law—who's tough to impress—asked for the secret. Best compliment? A foodie friend totally thought I'd gone to pastry school, but nope, these are really that easy!
Irresistible Ingredients
- Biscoff cookies: Crushed for the crust and that awesome spiced caramel flavor
- Full-fat cream cheese: Keeps the texture rich and just right
- Heavy cream: Whipped in for extra airy, smooth filling
- Cookie butter: Bold Biscoff taste in every bite
- Sour cream: Adds a little tang that cuts the sweet and makes everything silkier
- Powdered sugar: Blends in smoothly for a lump-free finish
- Vanilla extract: Rounds out the spices and deepens the flavor
- Dash of salt: Makes everything taste even better and balances the sugar
Simple Steps
- Add the Finishing Touches:
- Top with a swirl of whipped cream if you want to get fancy. Drop on a whole or crushed Biscoff cookie and drizzle melted cookie butter over each one.
- Fill Your Tin:
- Scoop or pipe cheesecake mix onto your chilled bases. Smooth the tops, gently tap to settle, then pop in the fridge covered for at least 6 hours—overnight is perfect.
- Make the Cheesecake Base:
- Beat your cream cheese smooth. Mix in the powdered sugar next, making sure it's all together. Add cookie butter, sour cream, a splash of vanilla, and some salt, whip again until even. Gently fold in that whipped cream to keep it fluffy.
- Whip the Cream:
- Cool down your bowl and mixers. Whip heavy cream until stiff peaks form, then stick it in the fridge while you make the filling.
- Crush the Cookies:
- Blitz Biscoff cookies into fine crumbs in your processor. Mix with melted butter until it feels like wet sand. Divide into lined muffin tins or mini cheesecake pans and press to form your crusts. Chill for 15 minutes so they firm up.
 Pin it
Trying these out, I noticed letting them chill overnight makes the texture next-level. Now my kid always wants these instead of cake for her birthday. The first time I brought them to a party, people thought I’d bought them from a swanky bakery! Nobody could believe I didn’t even turn on the oven. They look so fancy but are really easy to whip up.
Tasty Ways to Serve
Set these minis on a wooden board or slate for a laid-back vibe, or use single plates if you want to look super fancy. Berries (try strawberries or raspberries) pop against the cheesecake and taste great. You can dust a bit of cinnamon or cocoa powder for extra style. If you’re celebrating, try gold leaf as a shiny topper on the cookie butter drizzle. They pair awesome with espresso or strong coffee—the slight bitterness just works so well.
Fresh Twists
Use this as your jumping-off point and get creative! For a chocolate kick, melt some dark chocolate, let it cool, and fold it into the filling before adding the whipped cream. Coffee fans can mix in a little dissolved espresso powder for a mocha spin. In summer, grate a little lemon or orange zest for zing. Around the holidays, toss in more cinnamon, ginger, or nutmeg. No matter how you change it up, you keep that Biscoff magic and get something new every time.
Keeping Them Fresh
Store these cheesecakes in an airtight box in the fridge and they’ll stay nice for about four days. The base might get a bit softer but still yummy. If you want to keep them longer, they freeze like a dream—just wrap each one in plastic and stash them in the freezer for up to three months. Defrost in the fridge overnight for best results. For the prettiest look, save the drizzle and toppings until after they’ve thawed.
 Pin it
What's awesome about these no bake mini Biscoff cheesecakes is how they hit that sweet spot between simple and fancy. Hardly any hands-on time but the results are impressive. The warm, caramel spice flavor is such a fun switch-up from normal cheesecake. Personally, I love them for summer—no oven, just cool treats. Since they’re already portioned, you don’t have to mess with slicing cake for everyone. From chill backyard gatherings to dressy dinners, these little guys are always a hit and folks always ask for the how-to.
Frequently Asked Questions
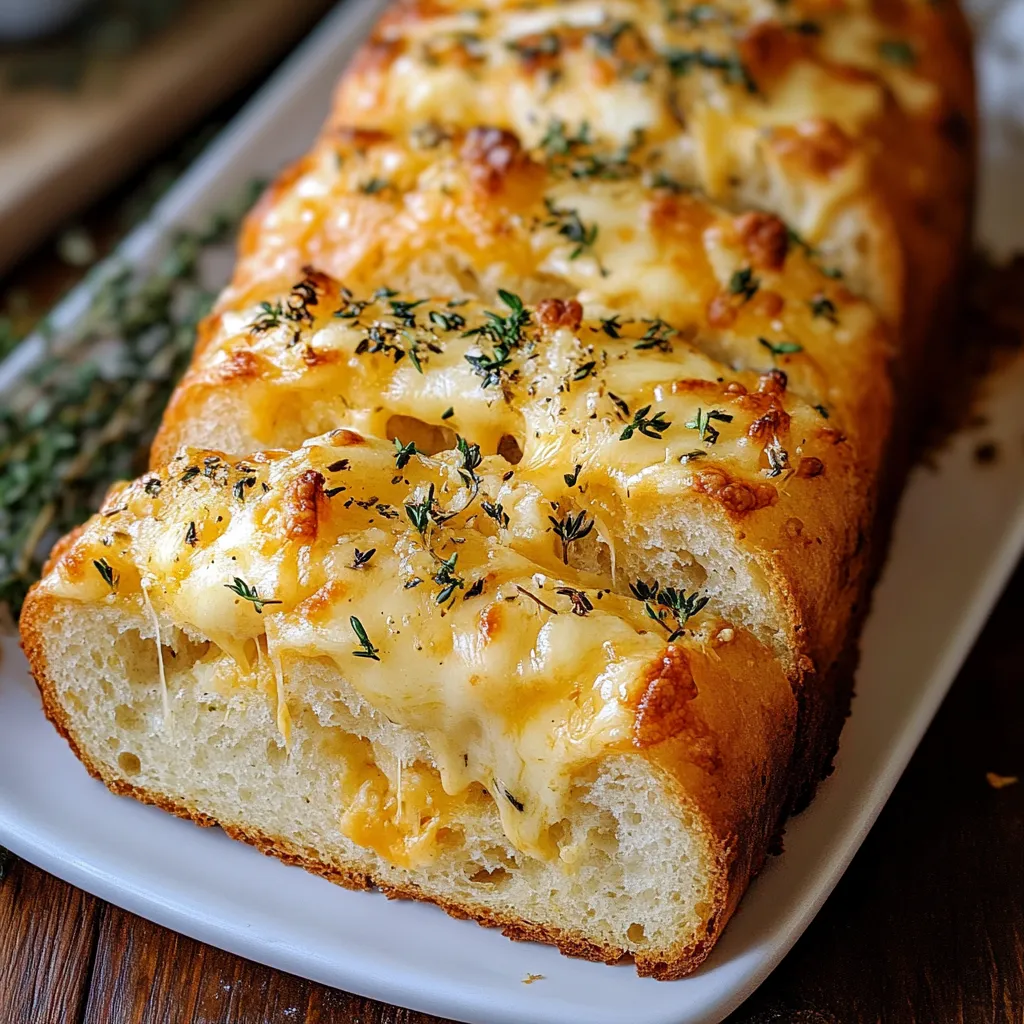
- → Can I use different herbs in this bread?
- You sure can! Swap in basil, rosemary, thyme, or chives—whatever you like or have around.
- → What other cheeses work well in this recipe?
- Gouda, Gruyere, mozzarella, or even blending a few cheeses together will work. Pick any cheese that melts nicely.
- → Can I make the dough ahead of time?
- Go for it—make the dough and stash it in the fridge for a day. Let it sit so it’s back to room temp before rolling.
- → Why is my bread burning on the outside but not cooked inside?
- The pan might be too hot. Turn down the heat and let it cook a little longer so it heats through evenly.
- → Can I bake this bread instead of pan-frying?
- Of course! Bake it at 375°F (that’s about 190°C) for roughly 20 to 25 minutes until it’s golden and cooked through.