
 Pin it
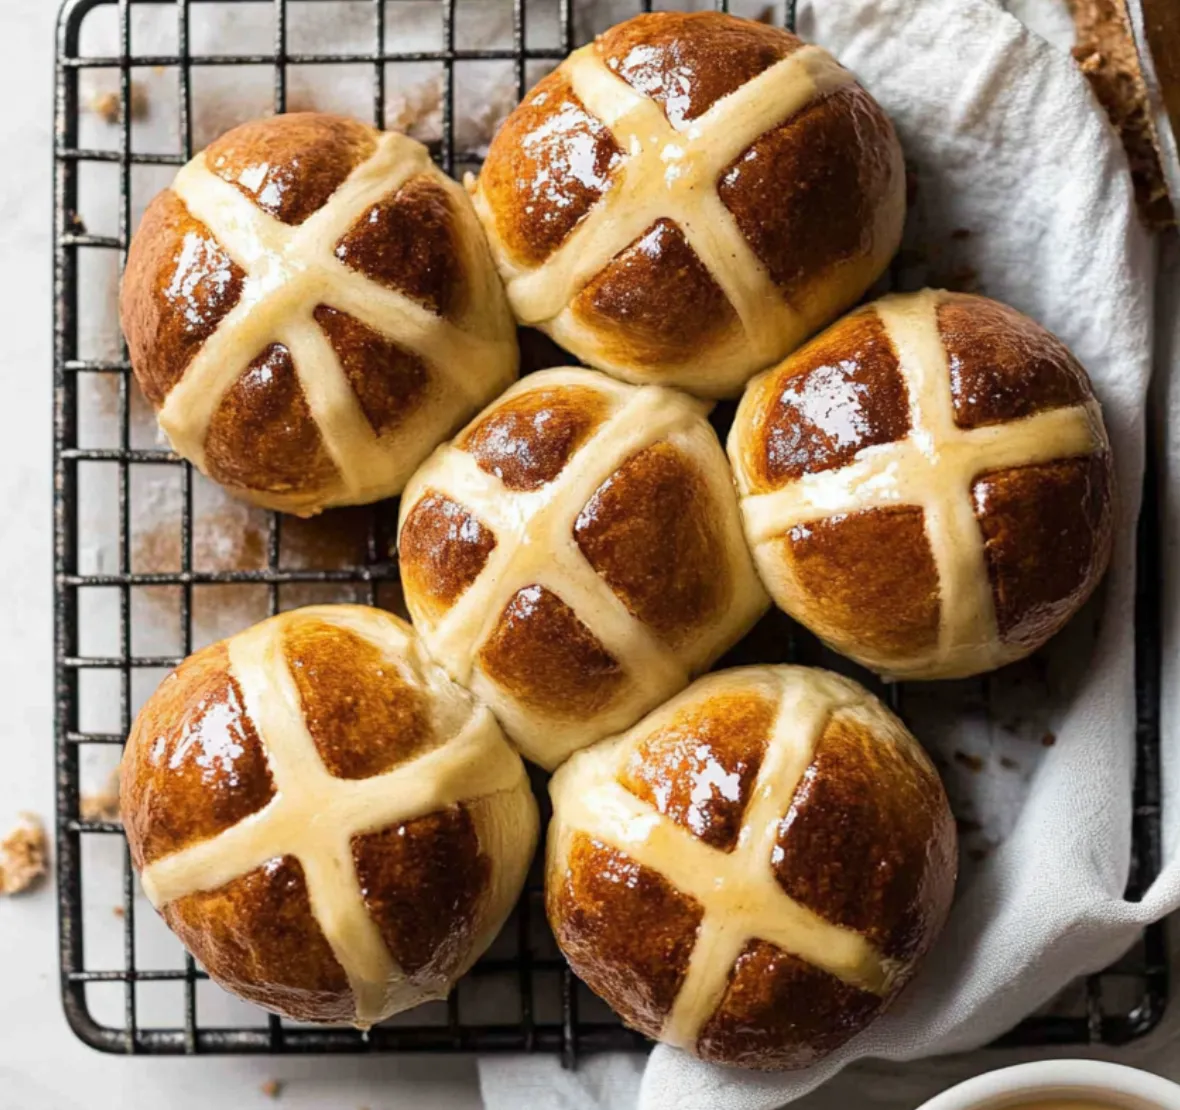
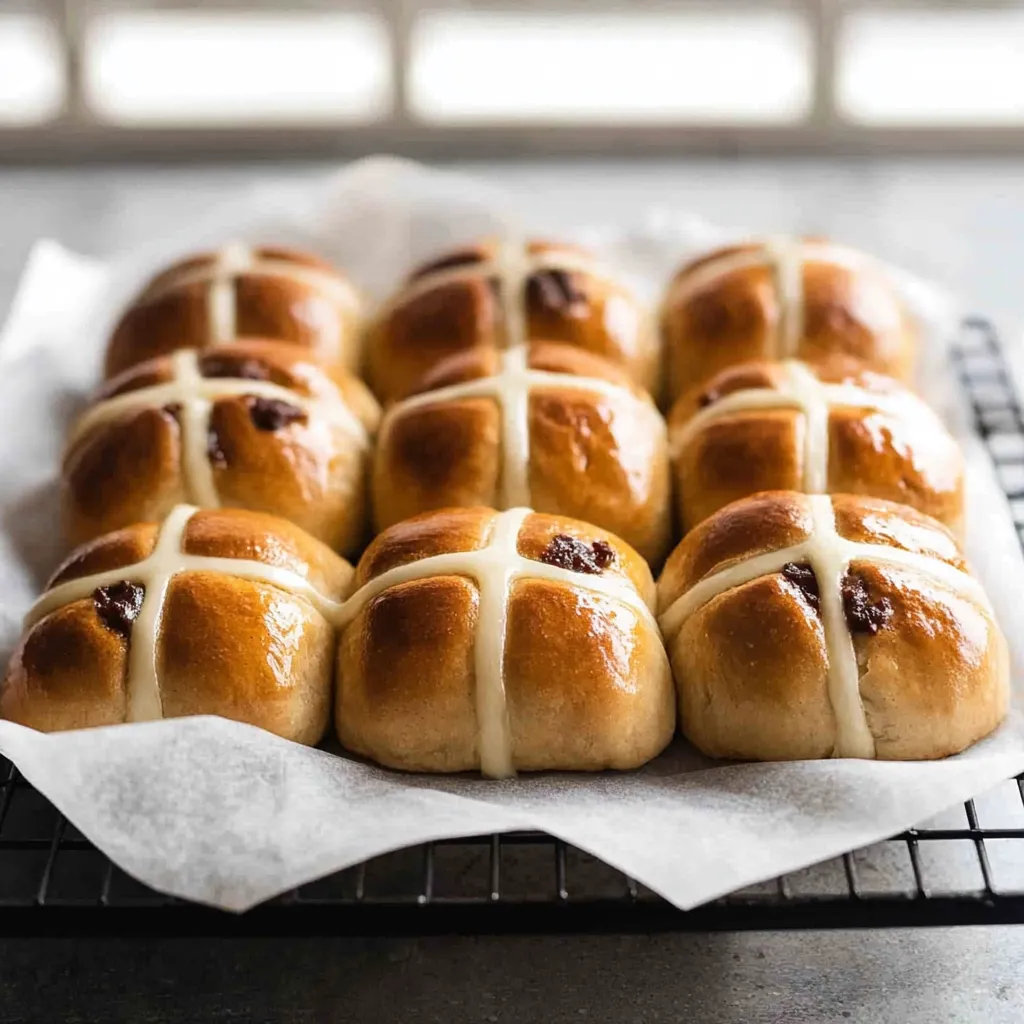
These plump handcrafted Hot Cross Buns turn out soft, perfectly seasoned goodies that'll make your house smell amazing. These classic treats have a soft, fluffy inside with just the right mix of spices and juicy sultanas, finished with the signature cross design and shiny glaze on top.
I started making these for Easter a few years back to keep family traditions going. What started as a holiday special has now turned into our go-to weekend treat whenever we want something fancy for brunch.
Ingredients
- Rapid rise or instant yeast: Gives you reliable, puffy texture every time
- Caster sugar: Adds sweetness that doesn't take over the flavor
- Milk: Forms the soft, rich dough that makes these buns so special
- Bread flour: Creates better texture and softness than regular flour
- All Spice and Cinnamon: Deliver that distinctive warm flavor everyone loves
- Sultanas: Give little pops of sweetness throughout the buns
- Orange zest: Adds fresh citrus kick that balances the rich dough
- Unsalted butter: Makes the dough rich and the texture just right
- Egg at room temperature: Helps with structure and adds richness
Step-by-Step Instructions
- Combine Your Dry Stuff:
- Throw flour, yeast, sugar, salt, and spices into a big bowl and give it a quick mix with your stand mixer's dough hook. This spreads the spices evenly and keeps the salt from touching the yeast directly, which can mess up the rising.
- Pour In Wet Ingredients:
- Add your butter, warm milk, egg, orange zest, and sultanas. The milk should feel like warm bath water. If it's too hot, you'll kill the yeast; too cold, and the yeast won't wake up properly.
- Work The Dough:
- Mix everything for about 5 minutes until you get a smooth, stretchy dough. Start slow and speed up once things come together. Add just enough extra flour so the dough doesn't stick to the sides but still feels a bit tacky. When done right, you can stretch the dough without tearing it, which means fluffy buns are coming.
- Let It Grow:
- Keep the dough in the bowl, cover with plastic wrap, and put it somewhere warm without drafts until it doubles in size. This builds flavor and can take anywhere from 30 minutes to an hour and a half depending on how warm your kitchen is.
- Form Your Buns:
- Punch the dough to get rid of air bubbles. On a floured counter, roll it into a log and cut into 12 equal pieces. For each piece, flatten it with your palm, then pull the edges toward the center and roll briefly to make the top smooth. Arrange them on a lined baking sheet in 3 rows of 4.
- Second Rise Time:
- Cover the buns loosely with oiled plastic wrap and let them puff up about 75% bigger. This second rise is crucial for extra fluffiness. While waiting, get your oven heating up.
- Make The Crosses:
- Mix flour and water into a thick paste that won't run when piped. Put it in a piping bag and slowly draw crosses on each bun, taking your time to follow the curves of the dough.
- Cook And Shine:
- Bake until the tops turn a deep golden color, around 22 minutes. While they're cooking, warm up some apricot jam with water. As soon as the buns come out of the oven, brush this shiny mixture all over them to get that classic glossy look.
 Pin it
Orange zest is my hidden gem in this recipe. I can still picture making these with my grandma, who always used zest from oranges in her backyard. The fresh citrus smell took over her kitchen as we worked, and now whenever I bake these buns, that memory comes right back clear as day.
Storage Tips
These buns taste best fresh on baking day, but they stay good longer than most homemade breads. Keep any leftovers in a sealed container at room temp for up to 2 days. If you want to keep them longer, stick them in a ziplock bag with all the air pushed out and freeze for up to 3 months.
Make-Ahead Options
Being able to prep these ahead makes them great for busy holidays when time's tight. Do the first rise, shape your buns, and put them on your baking tray. Instead of doing the second rise right away, cover the tray and put it in the fridge overnight.
Flavor Variations
While the classic version has sultanas and orange zest, you can switch things up with this dough. Try using chocolate chips instead of sultanas for a modern twist kids really go for. Candied citrus peel makes for a stronger citrus flavor, while a mix of dried fruits works great for holiday versions.
 Pin it
These buns take some effort but trust me, they're worth every minute you spend making them.
Frequently Asked Questions
- → Can I make the dough ahead of time?
Definitely! After the first rise, form your dough balls and put them in your baking pan. Skip the second rise and stick them in the fridge overnight. Take them out next day and let them sit somewhere warm until they come back to room temp and finish rising (about 2.5-3.5 hours). Then bake as normal. This waiting actually makes them taste even better!
- → What's the best way to reheat leftover buns?
For just one bun, pop it in the microwave for 15 seconds to make it soft again. For several buns, arrange them on a baking sheet, cover with aluminum foil (so they don't get too crispy), and warm at 160°C/320°F for around 8 minutes. They freeze really well too - just thaw and warm them up.
- → How can I tell if my yeast is still active?
Mix a teaspoon of yeast with half a teaspoon of white sugar and a quarter cup of warm water (40°C/100-110°F). Wait 10 minutes. If it gets foamy, creamy and smells like yeast, you're good to go. No foam means your yeast is dead and you'll need new stuff.
- → Can I substitute the sultanas with chocolate chips?
You sure can! Just use 2 cups of chocolate chips instead of the sultanas. Don't use more than that or you might end up with too much melted chocolate inside your buns.
- → What's the trick to getting smooth, round tops on the buns?
After you cut your dough into 12 pieces, push each piece down with your palm, then pull it together into a ball with your fingers. The main trick is to roll the dough a little bit, which pulls one side tight to make a smooth surface. Put this smooth side up when you place it on your baking tray.
- → How do I know when the buns are properly baked?
The top color tells you everything - look for a rich golden brown surface. This works better than just following the cooking time for these buns.