
 Pin it
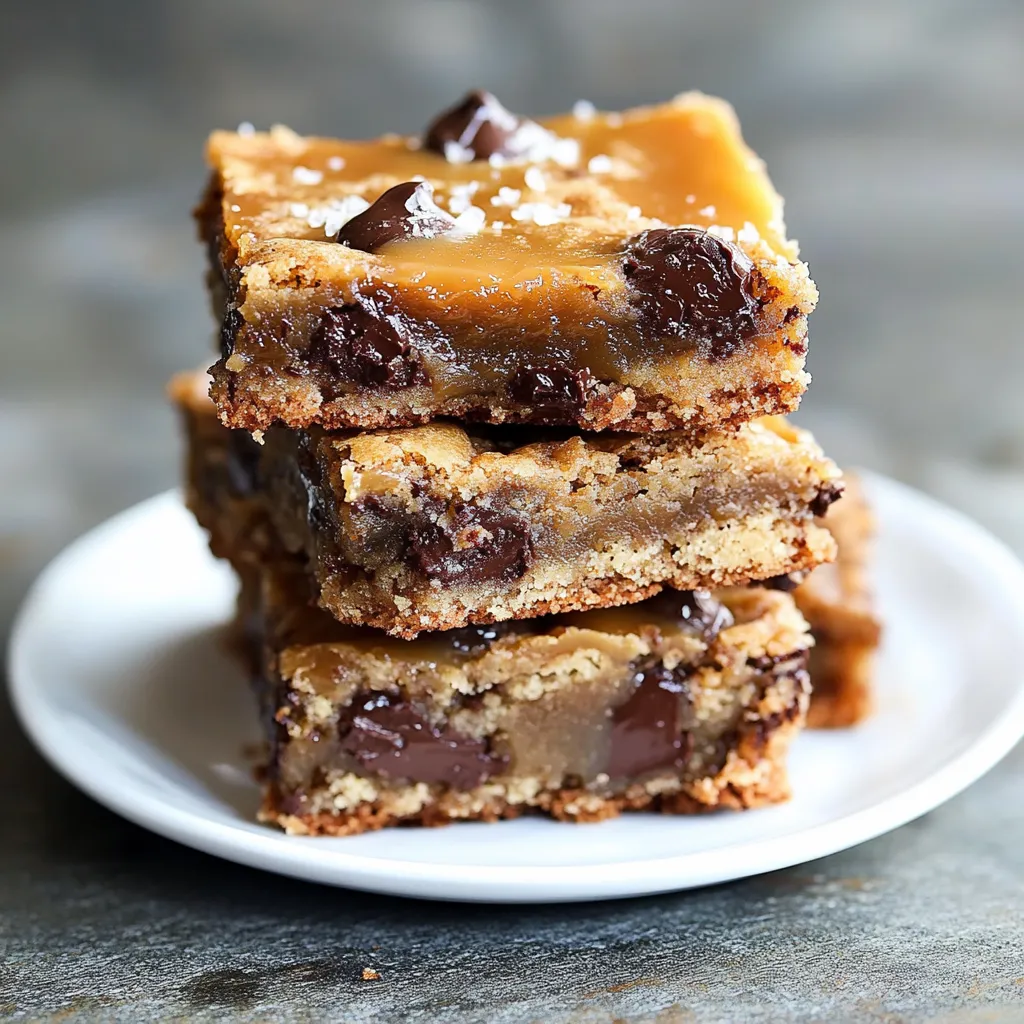
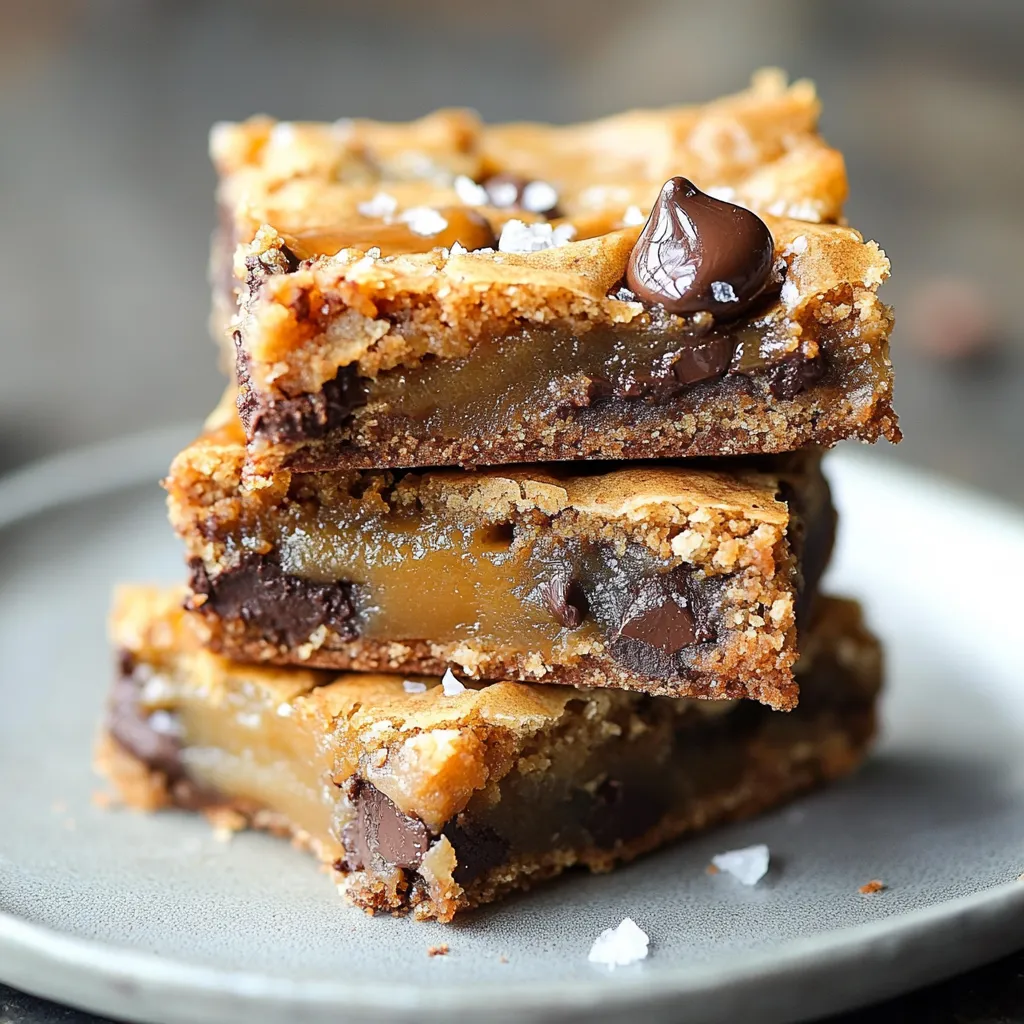
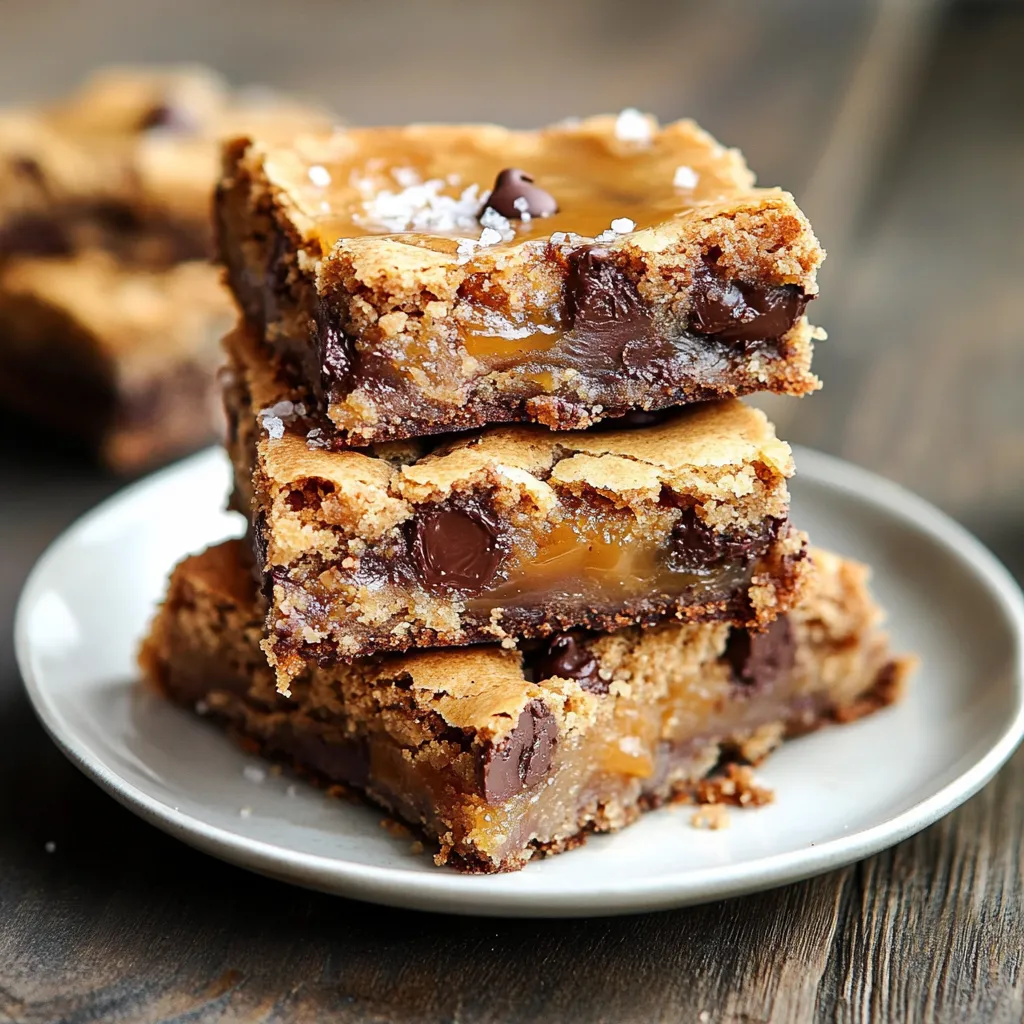
These over-the-top salted caramel chocolate chip cookie bars take your regular chocolate chip cookies to a whole new level. The gooey caramel sandwiched between two layers of buttery cookie dough makes for a mouthwatering treat that nails the sweet-salty combo just right.
I whipped these up for my kid's school fundraiser, and they vanished faster than anything else. Now my family won't let me show up to gatherings without them, and I've started making twice as many because they always get snatched up so quickly.
Ingredients
- Salted butter: Adds a rich base and boosts the caramel taste
- Light brown sugar: Brings a deep, almost toffee-like flavor
- Granulated sugar: Makes the edges nice and crispy
- Large eggs: Hold everything together for the right texture
- Vanilla extract: Gives a cozy background flavor
- Kosher salt: Cuts through the sweetness
- Baking soda: Creates just enough puff
- All purpose flour: Gives these bars their perfect chew
- Semi sweet chocolate chips: Add a hint of bitterness against the sweet caramel
- Sweetened condensed milk: Makes the filling super smooth
- Soft caramels: Turn into an amazing gooey layer
- Flaked sea salt: Tops everything off with that incredible sweet-salty kick
Step-by-Step Instructions
- Prepare Your Pan:
- Heat your oven to 350°F and put foil in a 9x13 inch baking pan with extra hanging over the sides. Don't skimp on the cooking spray. The foil works like handles to lift out your finished treats easily.
- Create the Cookie Base:
- Beat the butter with both sugars for a full 2 minutes until fluffy. This step puts air in the mix for better texture. Add in eggs, vanilla, salt and baking soda, mixing until smooth. Don't forget to scrape the bowl so everything gets mixed properly.
- Add Flour and Chocolate:
- Switch your mixer to low before adding flour so you don't end up wearing it. Mix just enough to combine, then stir in chocolate chips by hand. You'll end up with thick, sturdy dough.
- Assemble the First Layer:
- Push about three-fourths of your dough into the pan, making a flat layer. Slightly wet hands work great to stop the dough from sticking to your fingers as you spread it out.
- Make the Caramel Filling:
- Put condensed milk and unwrapped caramels in a pot over low-medium heat. Keep stirring so nothing burns. You'll know it's done when everything's melted together and looks silky smooth.
- Layer the Components:
- Pour most of the melted caramel over your cookie base, saving a bit for later use if you want. Drop small spoonfuls of leftover cookie dough on top. They'll spread out while baking for a cool marbled look.
- Bake to Perfection:
- Pop in the oven for 25-30 minutes, keeping an eye on it toward the end. The middle should be just firm but still soft. Look for slightly golden edges while the center stays softer.
 Pin it
My first batch was a happy accident - I forgot the salt and used unsalted butter. The difference was huge! Salt doesn't just balance out sweetness, it actually makes the caramel taste way better and more interesting. Sometimes I'll even throw in a bit more salt to really make the caramel flavor pop.
Make Ahead Tips
These bars actually taste way better the day after you make them when all the flavors have gotten cozy together. You can bake them up to three days before you need them, which comes in super handy during crazy holiday times. Just keep them in a sealed container with some parchment between layers so they don't stick together.
Storage Solutions
After they've cooled down completely, you can keep these bars in a sealed container at room temperature for about 5 days. If you want them to last longer, wrap each piece in plastic and toss them in a freezer bag. They'll stay good frozen for up to 3 months. Just let them sit out for an hour before you want to eat them.
Amazing Pairings
Try these rich bars with a scoop of vanilla ice cream for a fancy dessert. The warm bar and cold ice cream combo feels amazing in your mouth. If you're serving grown-ups, they go great with a glass of port or bourbon, which really goes well with the caramel flavors.
 Pin it
Get ready to watch these buttery, sweet salted caramel treats disappear at your next get-together!
Frequently Asked Questions
- → Can I use unsalted butter instead of salted?
Sure thing! If you're using unsalted butter, just bump up the kosher salt in your dough from 1 teaspoon to 1¼ teaspoons to keep the taste balanced.
- → How should I store these bars?
Keep them in a sealed container at room temp for up to 3 days. Want them to last longer? Pop them in the fridge for a week or freeze them first on a tray, then stack them in a container with parchment paper between layers for up to 3 months.
- → Can I use caramel sauce instead of melting caramels?
The bottled caramel sauce doesn't work as well and might make your bars too mushy. You'll get the best results by melting soft caramel candies with condensed milk like the directions say.
- → What's the best way to cut these bars neatly?
Let them cool completely first. Then lift the whole thing out using the foil edges. Grab a sharp knife, dip it in hot water and wipe it clean between cuts for the neatest squares.
- → Is flaked sea salt necessary?
You can skip it if you want, but it really makes these bars special. The salt brings out that awesome sweet-salty combo and makes the caramel and chocolate taste even better. Maldon salt works great if you can find it.
- → Can I add nuts to this recipe?
You bet! Throw in ½-1 cup of chopped pecans, walnuts, or whatever nuts you like when you add the chocolate chips. They'll add some nice crunch and flavor.