
 Pin it
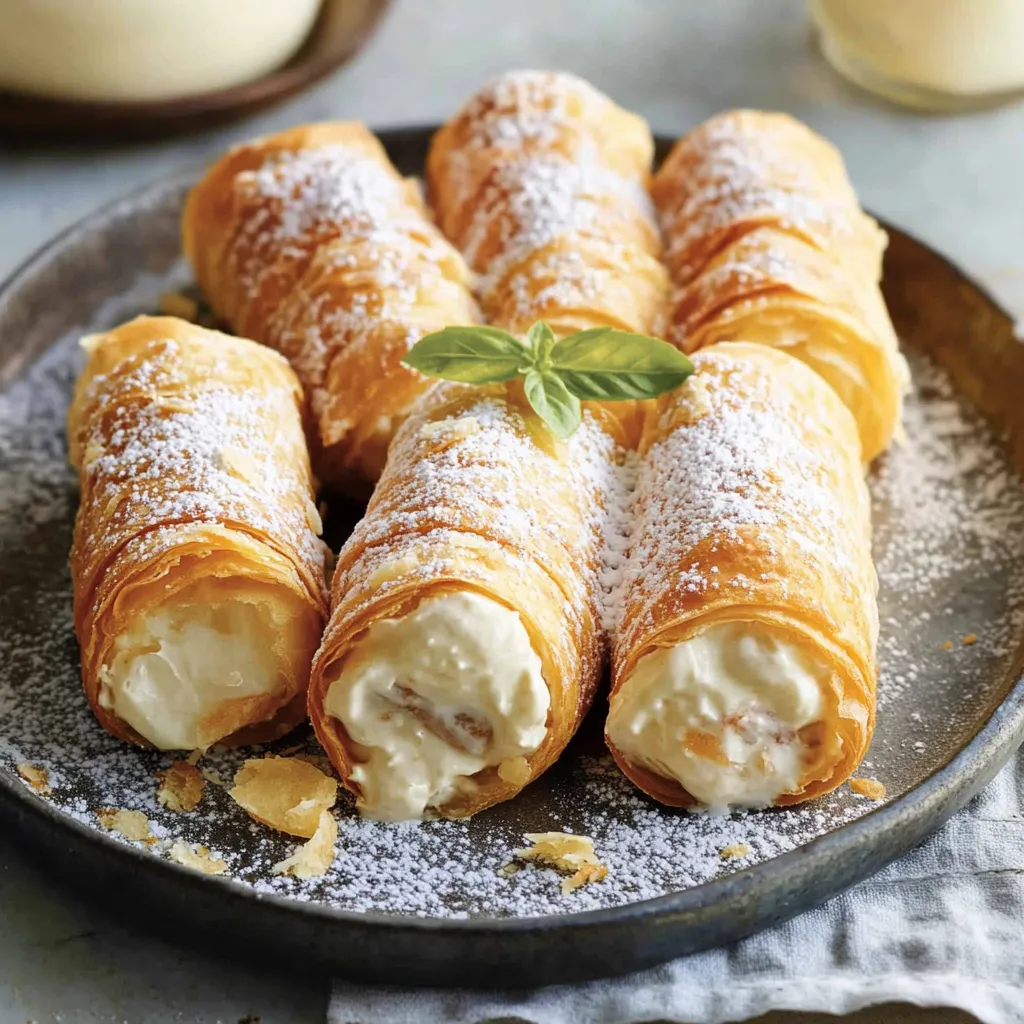
These delicate Italian pastry cones blend crispy, layered shells with smooth custard filling, giving you an authentic taste of Italy's beloved sweet treats. When you bite into one, the contrast between the crunchy outside and silky center takes you straight to a sidewalk café in Rome or Florence.
I whipped these cannoncini up for the first time at my grandma's birthday celebration. I was pretty worried about handling the puff pastry, but seeing everyone's faces light up after their first taste turned these into my go-to dessert for every family party since then.
Ingredients
- Egg yolks: They form the creamy foundation of your custard and add that gorgeous yellow color
- All-purpose flour: Makes your custard firm enough to pipe without running
- Sugar: Sweetens everything while toning down the eggy taste
- Vanilla extract: Gives that essential flavor kick - skip the fake stuff and go for real extract
- Milk: Pulls all ingredients together - full-fat works best for creaminess
- Puff pastry sheet: Creates your flaky outer shell - all-butter kinds taste way better
- Sugar: Does double duty by adding sweetness and creating a tasty brown crust when baked
- Egg: Brushed on top to make your pastry shine with a golden glow
- Powdered sugar: Sprinkled on top for that pretty finishing look
Step-by-Step Instructions
- Make Your Custard Base:
- Warm the milk in a pot until you see steam rising but don't let it boil. This careful heating stops burning while making sure it's warm enough to help thicken your mixture later.
- Mix Your Other Ingredients:
- In another bowl, beat egg yolks, sugar, vanilla, and flour until you notice the mix getting lighter. Don't rush this part - beat for at least two minutes until you see it turn pale yellow. This makes your custard super smooth.
- Mix Hot With Cold:
- Slowly pour your hot milk into the egg mix while constantly whisking. This gentle method stops the eggs from cooking too fast and turning lumpy. Keep stirring the whole time to blend everything smoothly.
- Cook Until Thick:
- Put everything back in the pot over medium heat, keeping your wooden spoon moving all the time. Scrape the bottom and sides so nothing sticks. You'll know it's done when the custard coats your spoon nicely, usually after 5-7 minutes.
- Cool It Down:
- Pour your finished custard into a clean bowl and quickly cover with plastic wrap, pushing it right onto the custard surface to stop a skin forming. Pop it in the fridge for at least an hour so it sets up right and tastes even better.
- Get Your Pastry Ready:
- Heat your oven to 400°F and roll out your puff pastry on a surface covered with sugar. The sugar stops sticking and gets all caramelized when baking. Aim for a 9x12 inch rectangle, then cut it into 12 strips about an inch wide.
- Roll Your Cones:
- Wrap each strip around a cone mold, letting the pastry overlap as you twist from bottom to top. This overlapping is what gives you those amazing flaky layers. Put them seam-side down on a baking sheet with parchment paper so they don't unravel.
- Bake Them Up:
- Mix an egg with a spoon of water and brush it over your pastry cones. Bake for 15-20 minutes until they puff up dramatically and turn deep gold. The sugar caramelizes and adds an amazing flavor beyond just sweetness.
- Put It All Together:
- After they're cool enough to touch, carefully slide the pastry shells off their molds. Load a piping bag that has a star tip with your cold custard. Fill each pastry cone from both ends so every bite has cream in it. Sprinkle powdered sugar on top right before you serve them.
 Pin it
My favorite moment making these is watching the pastry come out of the oven all golden and puffy. Seeing simple ingredients turn into something so beautiful reminds me of my Italian neighbor making these when I was little. She always let me shake the powdered sugar on top, calling it "snow magic" that made desserts extra special.
Storage Tips
Once filled, these treats are best eaten within 4-6 hours. After that, moisture from the custard starts softening the crispy shell, and you'll lose that amazing crunchy-creamy contrast that makes them so good.
If you want to prep ahead, keep the parts separate. Empty baked shells can sit in an airtight container at room temp for up to two days. The custard stays fresh in the fridge for up to three days if you keep it in a sealed container with plastic wrap pushed right against its surface.
If you have leftover filled ones, keep them in the fridge and let them sit out for about 20 minutes before eating. You can try popping them in a 300°F oven for 3-5 minutes to crisp them up a bit, though they won't be quite as perfect as fresh ones.
Regional Variations
Our version follows the Northern Italian style, but you'll find these cream-filled goodies all over Italy with local twists. In Sicily, they often add lemon zest or mix in some pistachio paste with the cream. Venice bakers might splash some Amaretto into their custard for a boozy kick.
The shape changes too. While we use the classic horn shape, some areas make cylinder forms or fold the pastry into little rectangles. What stays the same everywhere is that magical combo of buttery, crisp pastry with rich, smooth custard.
Even the name changes as you travel around Italy. Up north they're "cannoncini" (meaning "little cannons"), but you might hear "cornetti" in some towns or even "trombette" in others - all names that point to their horn-like shape.
Serving Suggestions
These pastry horns look amazing as the main attraction on an Italian dessert table. Set them out on a pretty plate with powdered sugar on top and maybe some fresh berries scattered around for a pop of color.
For the true Italian experience, serve them with strong espresso or cappuccino. The bitter coffee perfectly balances the sweet cream, just like in a real Italian café.
Try creating a dessert spread with these as the star, surrounded by amaretti cookies, fresh fruit, and tiny glasses of limoncello for an after-dinner treat that'll make everyone feel like they've been whisked away to Italy.
 Pin it
Frequently Asked Questions
- → What helps the pastry stay flaky?
Keep the puff pastry dough chilled throughout handling, and be gentle to avoid overworking it. Rolling on a sugared surface adds extra crunch and flavor too.
- → Can I prepare the cream ahead?
Absolutely, the cream can be prepped the previous day. Just cover it with plastic wrap directly on the surface and refrigerate to keep it fresh.
- → What’s a substitute for vanilla extract?
You might use vanilla bean paste or scrape out a vanilla pod for a deeper, more authentic flavor profile.
- → How do I make this without gluten?
Switch to a gluten-free puff pastry option and pick a gluten-free flour mix for the cream. Be gentle with the gluten-free dough, as it’s more delicate.
- → Can I save leftovers?
For the best pastry texture, serve fresh after assembly. Leftovers can, however, be stored in the fridge for up to two days.