
 Pin it
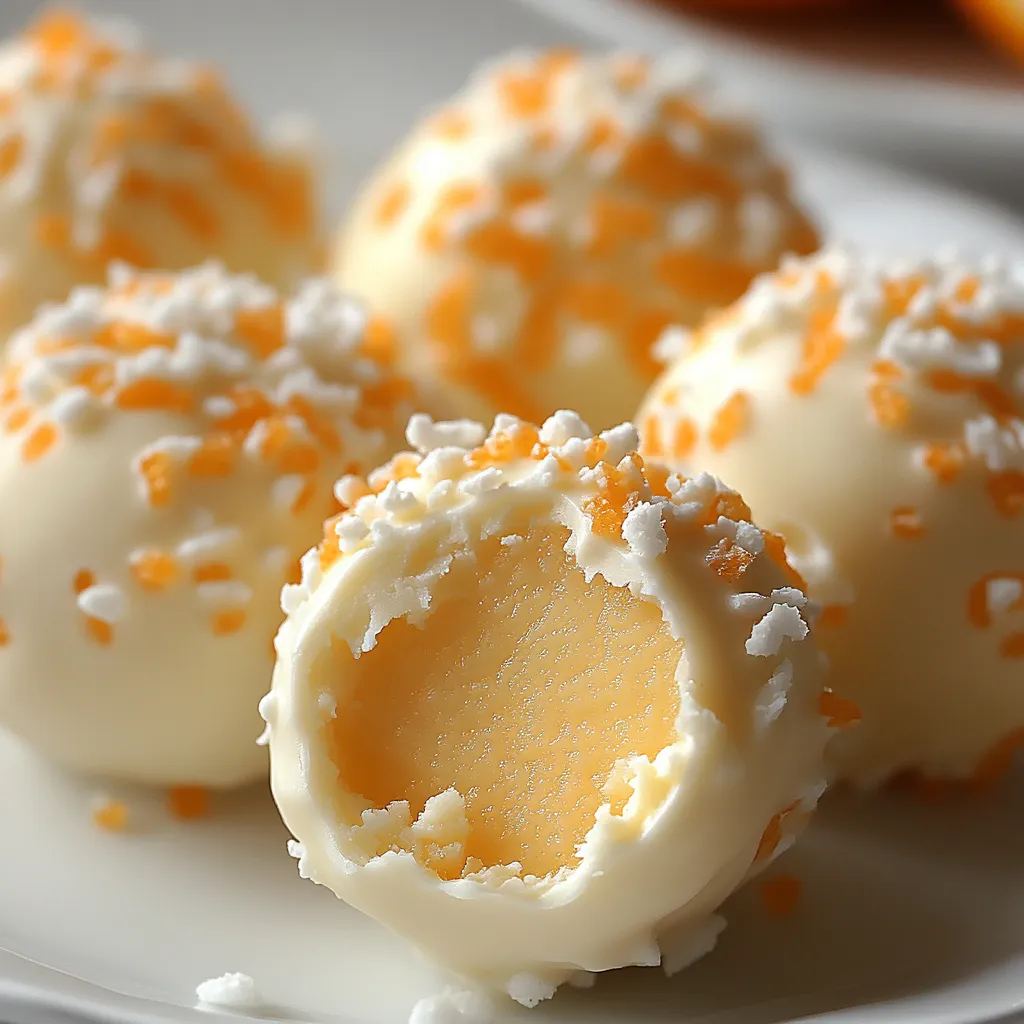
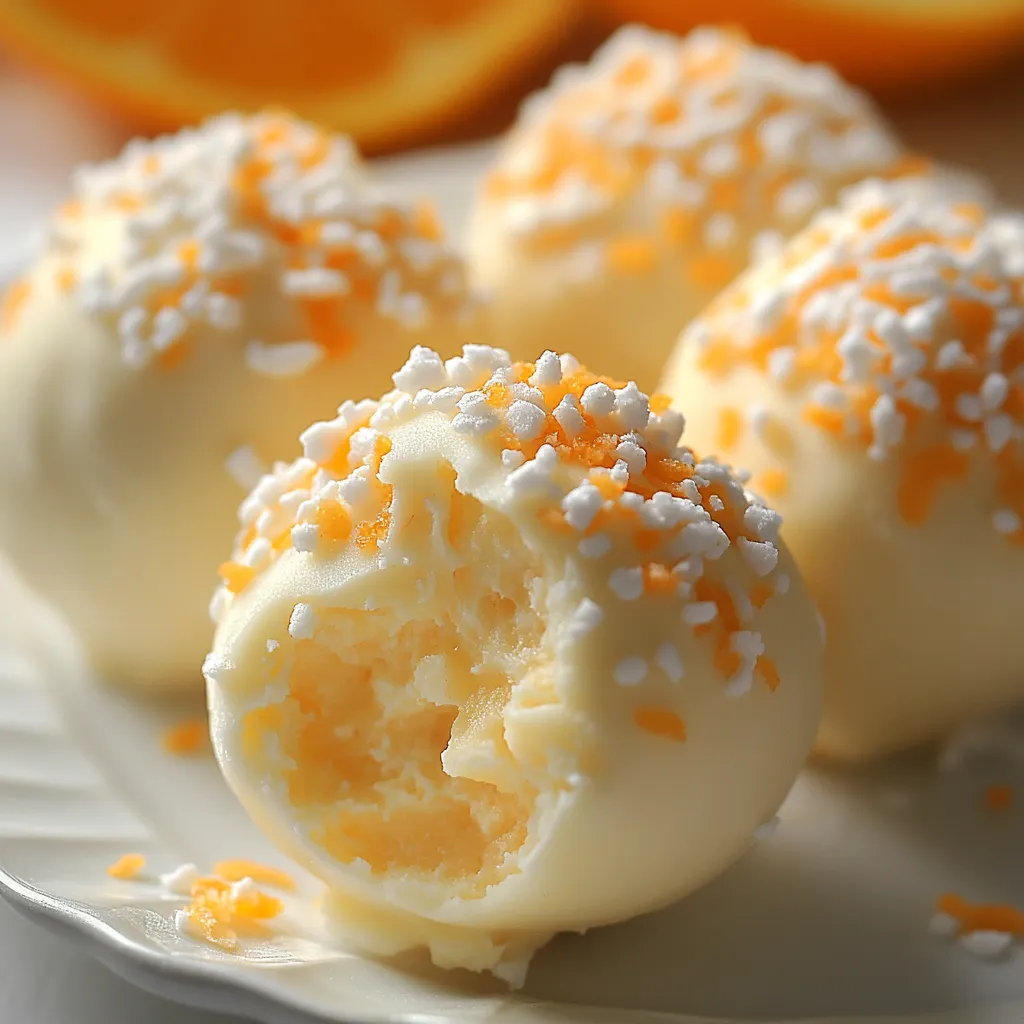
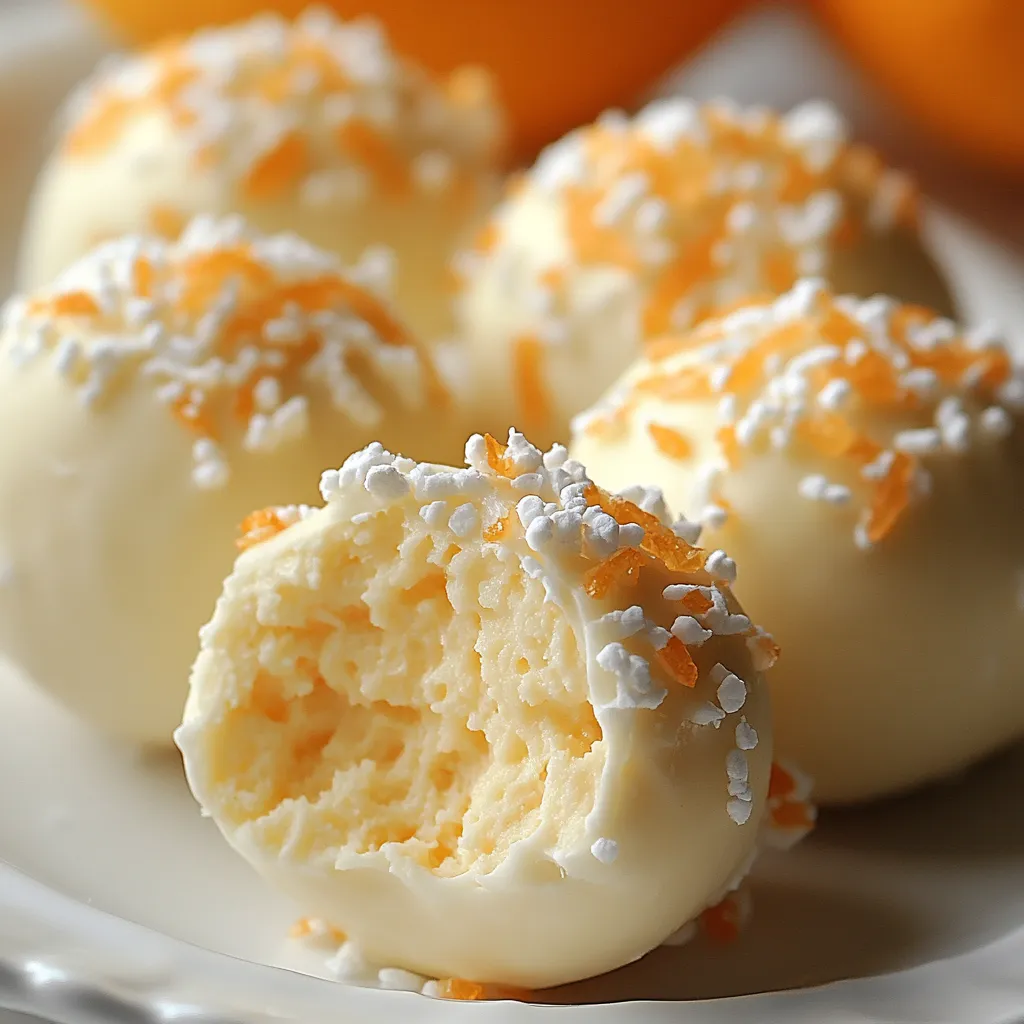
If you love the classic orange-vanilla combo, these creamy truffles will totally hit the spot. They're bite-sized, seriously delicious, and you never have to mess with turning on your oven. That zesty punch of orange with smooth white chocolate makes these treats impossible not to grab seconds. Give them as a homemade present or bring them to parties—people can't resist.
Back when the weather was blazing, I whipped up these truffles for a poolside get-together. I had no clue they'd be the first thing gone. My family asks for them all year long now, no matter what season we're in.
Tasty Ingredients
- White chocolate chips: Make that silky shell on the outside and snap perfectly once set
- Optional: Sprinkles or more zest: Go wild and sprinkle on top for extra fun and flavor clues
- Vanilla extract: Adds a cozy balance to all that citrus goodness
- Orange zest: It amps up the bright orange vibe, try organic for max flavor
- Powdered sugar: Sweetens things up and keeps the mix sticking together
- Orange juice concentrate: Packs a big orange flavor without watering things down
- Vanilla wafers: Adds structure and that hint of vanilla in every bite
- Unsalted butter: Makes everything rich and helps get that smooth texture you want
Simple Step-by-Step
- Finish Strong:
- Pop the truffles back in the fridge for about 15 to 20 minutes until the coating firms up. Want them chilled or room temp? You pick when it's time to serve.
- Final Touches:
- While the white chocolate’s still glossy, toss on your favorite garnish fast—the chill from the truffle will set things up before you know it.
- Dip Like a Pro:
- Take a handful truffles out at a time (keep the rest cold), and dunk each in the melted chocolate using a fork. Tap off the extra chocolate before dropping them back on the paper to dry.
- Get That Coating Ready:
- Microwave the white chocolate chips in short bursts (20 seconds does it), stirring between rounds until everything’s silky smooth. Got clumpy chocolate? A splash of coconut oil or shortening loosens it right up.
- Let ‘Em Firm Up:
- Stick the rolled truffles in the fridge for a half hour so they firm up nicely. This part’s key—it keeps them round for dipping and helps that shell stick just right.
- Shape Those Balls:
- Use a small scoop or spoon to portion the dough, then roll with your hands till smooth. Too sticky? Chill the mix for 10 minutes, then try again. Set each ball on parchment to wait for its chocolate bath.
- Mix in the Crunch:
- Now add those super-finely crushed vanilla wafers, made sandy using a food processor if you have one. Stir till a dough comes together and you can squeeze it into a ball.
- Add Big Flavor:
- Add thawed orange juice concentrate, vanilla, and zest if you want. Blend till smooth—even if it looks weird or split, it'll be fine once you add the cookies.
- Whip Up the Base:
- Soften the butter but don’t melt it, and beat with powdered sugar for about two minutes using a hand mixer. Stop when the mixture turns light and fluffy.
 Pin it
Orange juice concentrate is where all the flavor magic happens here. I played around with all sorts of orange options, but this one packs the punch and brings back those summer days chasing down the ice cream truck, all in a single bite.
Storage & Make Ahead
Go ahead and prep these babies early for any party or event. Once they’re set, stack them in an airtight box with parchment between the layers—no sticking messes. They’re best if you eat them within the first week for the boldest orange flavor, but you’ll get a solid two weeks in the fridge. Stash them in the freezer if you want, and thaw in the fridge overnight before serving up.
Fun Flavor Swaps
Want to mix up the flavors? Stir cocoa powder into the mix and coat with dark chocolate for a rich chocolate-orange taste. Love lemon? Swap in lemon concentrate and zest. Feeling festive? Throw in a bit of peppermint extract and finish with crushed candy canes. Personally, I sometimes stir in chopped crystallized ginger for a grown-up twist that goes amazing with tea.
Easy Fixes
Finding your dough is sticky and won’t roll? The butter was probably too warm. Pop it in the fridge for 15 minutes and try again. Dough crumbling? Add orange juice concentrate, a teaspoon at a time, till it sticks. Chocolate won’t coat or looks weird? Make sure it’s warm but not hot, as overheating can mess with the texture. If the coating hardens too fast, warm it gently and mix in a little shortening to loosen it right up.
 Pin it
Bring these orange truffles to your next get-together or tuck them in a gift box—they’re creamy, nostalgic, and vanish faster than you’d think.
Frequently Asked Questions
- → How long will these orange bites last?
Keep these in a sealed container in your fridge for about a week. You can also pop them in the freezer for as long as 3 months. Just let them thaw in the fridge before snacking.
- → Can I swap in real orange juice for concentrate?
Real orange juice isn’t strong enough and makes the mix too loose. If you want to try, use half as much and mix in a bit of orange extract for more flavor.
- → What else can I use if I don’t have vanilla wafers?
Try crushed shortbread, graham crackers, or golden Oreos (scrape out the filling first). Just crush ’em up super fine so your dough keeps its shape.
- → Why did my melted white chocolate get chunky?
If white chocolate gets too hot or even a tiny bit wet, it can clump. Melt slowly and stir often. Keep all your bowls and spoons bone-dry before you start.
- → Is it possible to make these without dairy?
You bet! Swap out the regular butter for a dairy-free kind, and grab dairy-free white chocolate chips or coating. Lots of vanilla wafers are dairy-free, but peek at the label to double-check.
- → What if my mix is too sticky to roll?
If it’s super gooey, just toss in another spoonful or two of crushed cookies. Or stick the bowl in the fridge for 15 to 20 minutes to stiffen it up.